Another operating system comes out from the era of open source, they are making things so faster that closed source system must think about their tech shares and market. However, we can say that open source systems are just making things so portable and light version, so that people can use them so easily and so comfortably………
They are making products specific, like if anyone is so used to with their social networking just give those things near to their hands, and just installed those required softwares or better to say packages what are needed to write things, edit, manage, undo and of course the media drivers…..because without them a PC is nothing………
So they make another specific, strong, portable and comfortable Operating system specially for netbook or laptop users, JoliCloud (Cloud with joy). JoliCloud is the OS which ensures you the most important point for the users (Novice and for the pro’s also) that, it can be easily installed side by side with your Windows OS. Maximum novice users like me made a mess while we install linux versions in our desktop PC’s with windows xp, vista or 7 by it’s side. But hey! No need to worry again while you install linux OS (Ubuntu, Fedora, Mandriva, CentOS, Redhat, Scientific Linux, SUSE and more open source OS). There’s a must say that, we make error in the partitioning sector while system wants its place in the hard disk. But now listen joyfully- Worlds 1st OS (JoliCloud) comes with an .exe file whose size is merely (16.00 MB). You just need to download this file from http://www.jolicloud.com from this website. And execute it from your existing Windows OS. It will download the whole OS with in 45 minutes and gives you the simple instructions in a simple coffee time manner. Jolicloud comes with an USB creator also. First jolicloud 1.0 comes up with those users who uses netbook because the display size of a netbook is max 11”. It supports that much size. Another cause for bringing it is netbook users maximum uses the word processor for documents, listening music, watching movies doing light works and especially they use internet on the move so they need all the social networking sites and that’s why it comes with a logical chip which connects to the internet very speedily.
So in all netbook users can use this OS for real fun and some serious work with funny environment. Oh I forgot to tell you that jolicloud doesn’t give the professional look like Microsoft windows neither the look of Ubuntu Lucid Lynx. It’s funny, very colorful, soothing atmosphere. Twitter, facebook, Gmail, LinkedIn, Picasa etc in your punch. Punch those applications like never before. It’s graphics is beautiful. Appearance is fantastic, folders, icons, starting music these common features are eye and ear catching. Later jolicloud comes with an update which gives you desktop version which can be run from our home PC. For that you just install the OS , connect to the internet and make an update of your OS. That’s all. You can switch between versions. Working with jolicloud is a real fun with some practical work. A lightweight OS which takes you through a simple installation instructions which will be given below :-
1. Download Jolicloud Express
You can download Jolicloud Express here: www.jolicloud.com/download.
Here is the MD5 sum of the Jolicloud Express file: MD5 (JolicloudInstaller.exe) = a75b8e4f137d466dbee25c1b8f4d4779
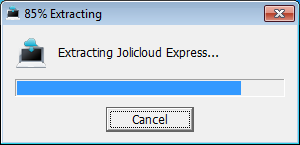
Once you have downloaded the JolicloudInstaller.exe file, double-click on the icon to extract the file.
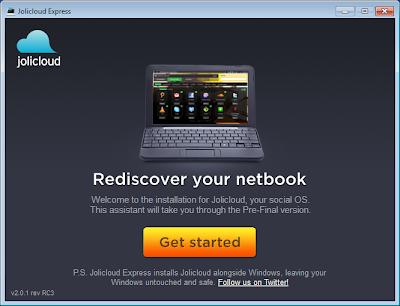
On the first welcome screen, click on ‘Get Started’.
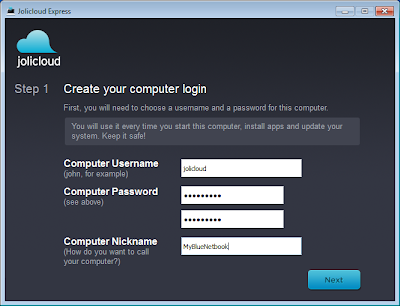
2. Create your computer login
3. Manage your set up configuration
By default, Jolicloud Express chooses the set up configuration that would give you the best experience: It picks the disk you are currently using, and allocates half of the available space on that disk for Jolicloud. It also chooses your existing system language.
If you are happy with the default configuration, click ‘Next’. If you want to make changes to the configuration, click ‘Change’.
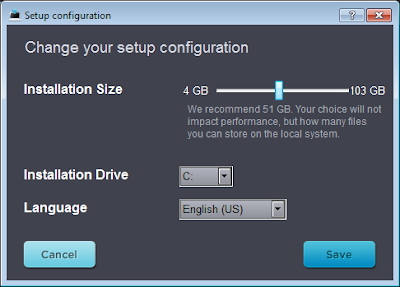
Change options
By clicking on the 'Change' button, a new window pops up where you can change your setup. You can select another disk to install Jolicloud, and decide how much disk space you want to use for Jolicloud, from 4GB to almost all the free available space on your hard drive. Your choice will not impact performance, but how many apps and files you can store locally. You can also select a different language to use on Jolicloud.
Click ‘Save’ when you are done.
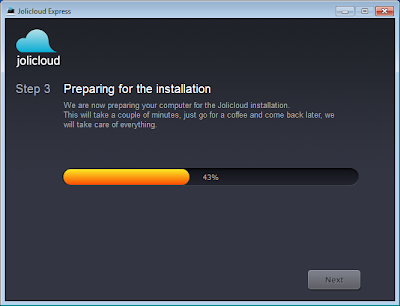
4. Prepare for install
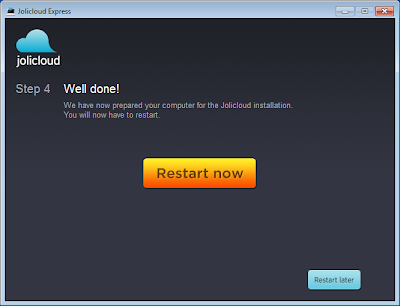
Once the preparation is complete, click ‘Restart now’.
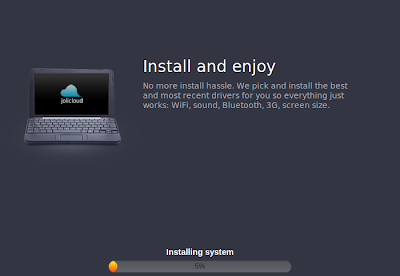
5. Install Jolicloud
6. Activate your Jolicloud account

Make sure your netbook is connected to the Internet
You will need to connect your netbook to the Internet to make the most of Jolicloud.
When your netbook is not connected to the Internet, the icons at the top right of your screen will look like this:

To connect your netbook to the Internet, click on the network icon.
Choose the wired or wireless network you want to connect to from the options in the roll down menu.
A window pops up indicating which network your netbook is connected to.
When your netbook is connected to the Internet, the icon will indicate that the WiFi connection is on:

2 - Click the ‘Get Started’ icon on the launcher.
3 - Enter your username and password.

4 - Register your netbook and pick a name for it.

Congratulations! Your netbook is now connected to your Jolicloud account.
7. How to install applications
Make sure your netbook is connected to the Internet.
1 - Click on the blue Jolicloud icon (in the central part of the launcher, or at the top right corner of your screen).
You will see a Welcome screen with four main tabs: Dashboard, Applications, Settings and Lab, and a yellow box on the top right side ‘Search friends and apps’.
2 - Click the Applications tab. You can chose to browse applications by category or to see all of them click ‘All’.
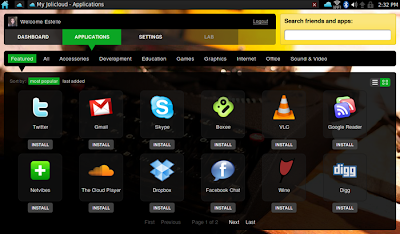
3 - To see a short description of the application simply click on an application icon.
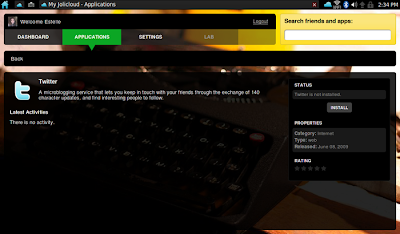
4 - To install an application, click on the ‘INSTALL’ button below the icon.
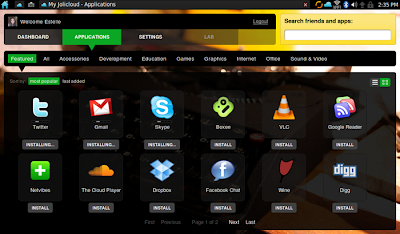
To install several applications at the same time, click on the ‘INSTALL’ button below each of the applications icons.
5 - Once you have installed applications, you will be able to see them in the launcher: to go back to your Jolicloud launcher, click on the blue house icon at the top left corner of your screen.
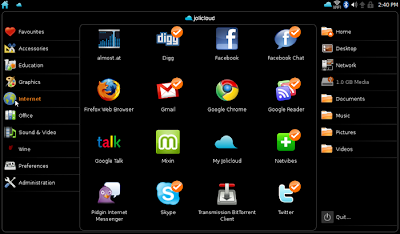
6 - Browse the applications you have installed using the category menu on the left side of the screen.
7 - To launch an application click on the application icon in the central area of the screen.
8. Update your system
Make sure your netbook is connected to the Internet.
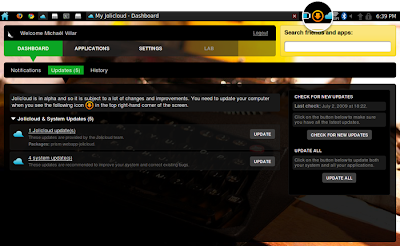
With Jolicloud, updates come really easy. Check for and run new updates in: Jolicloud > Dashboard > Updates.
If there are updates available for your machine then you should always run them as soon as you can. That will allow you to always be on top and benefit from our latest improvements.
9. How to find and follow Jolicloud users
Make sure your netbook is connected to the Internet.
1 - Click on the blue Jolicloud icon (in the central part of the launcher, or at the top left corner of your screen).
You will see a Welcome screen with four main tabs: Dashboard, Applications, Settings and Lab, and a yellow box on the top right side ‘Search friends and apps'.
2 - Use ‘Search friends and apps’ to find who you are looking for.

3 - Click on the user name to access their profile. Click on the ‘Follow’ button under ‘Status’ on the right side of your screen.
4 - You are now able to follow the activity of the people you follow under Dashboard > Notifications.
3 - Click on the user name to access their profile. Click on the ‘Follow’ button under ‘Status’ on the right side of your screen.
4 - You are now able to follow the activity of the people you follow under Dashboard > Notifications.
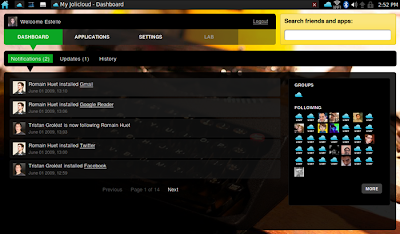
5 - When you receive new notifications, you will see the Jolicloud icon in orange with a number underneath. It will look like this:

Click on the orange icon to access your notifications.
How to uninstall Jolicloud Express
1 - Select Windows at boot.
2 - Once Windows is launched, go to ‘Control Panel’ > ‘Programs’ > ‘Programs and features’. Select ‘Jolicloud’ to uninstall it.
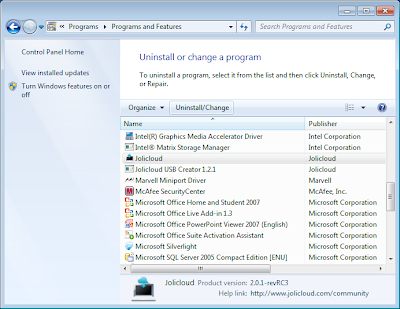
Your system extracts the Jolicloud Express uninstaller.
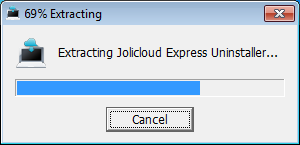
3 - Confirm that you want to uninstall Jolicloud.
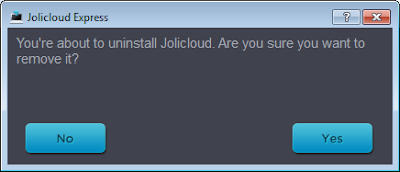
4 - Click ‘OK’.
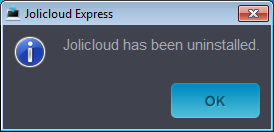
Jolicloud has now been uninstalled from your computer.
No comments:
Post a Comment